Bikepacking Gear List for Six Months in Europe
When compared to our past experience, selecting gear for a bikepacking trip feels a little like a cross between packing for a dual-sport motorcycle trip and ultra-light backpacking. Put simply, the less we carry, the greater our freedom to explore and the more enjoyable the ride. It's an exercise in minimalism where the goal is to limit weight and bulk and maximize livability. To get it right, every item in our bikepacking gear list needs to serve as many functions as possible. Once we had our Surly ECR's outfitted, we focused on fine-tuning our packing list.
Our needs for bikepacking Europe are fairly broad. To add some context to our packing decisions, here's a quick summary of our bikepacking requirements:
- A relatively long six-month trip that achieves a balance between livability and minimalism (i.e., we're on the road for a long time so don't want to live in squalor, but also don't want to compromise go-anywhere freedom or lug a heavy load up the Alps either)
- Varied seasons/climate that runs from mid-summer to late fall / early winter and extends across climates ranging from hot to moderately cold (low to mid 30's) and sunny to wet
- Varied terrain that includes stretches of paved road interspersed with rides on gravel and single track
- Frequent camping, including wild camping when possible
- Self-sufficient enough to get beyond-the-beaten path for a few days at a time
- Prepared for travel beyond Europe (Central Asia, Middle East, etc.) as our plans are reliably changeable
- Opportunity to field test gear and get-to-know equipment that we plan to use further afield (i.e., Africa, etc.)
Below you'll find a summary of the bikepacking equipment and kit we selected to meet our requirements. We hope that providing our gear list will help save you time in making yours. To skip ahead to a particular section, click the table of contents (toc) below:
Disclosure: This page may contain affiliate links, and as an Amazon Associate I earn from qualifying purchases. Clicking through for additional information or to make a purchase may result in a small commission at no extra cost to you. We hope you find this information useful and welcome any questions you may have.
Bike Maintenance & Repair
Tools
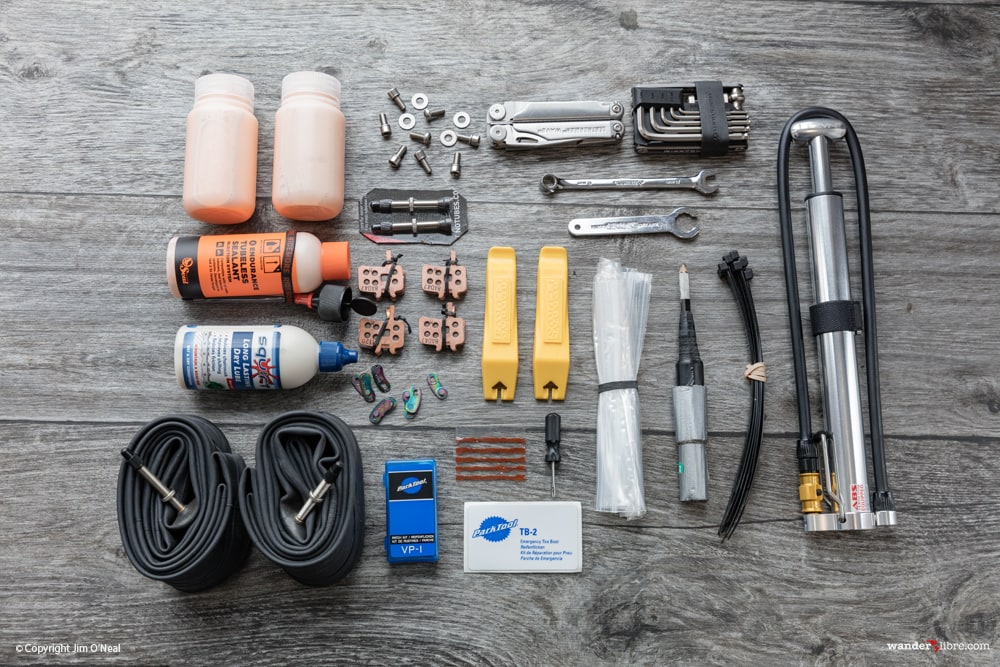
Compared to traveling on motorcycles or in our Land Cruiser, the tools and spares for a bike are pint-sized. It's brilliant. Our toolkit is simple but effective. Built around a Leatherman Wave and Blackburn's well thought out Wayside Multitool, we're pretty well covered for basic maintenance and repairs. With removable hex keys and tools for everything from valve core removal to chain repair and spoke tensioning, the Blackburn Wayside Multitool is a compact and versatile little tool that's ideal for bike touring
Tire Repair
Running a tubeless setup, we approach tire repair much the same way as our other vehicles. We carry a diverse array of solutions to address pretty much anything short of a tire being shredded to pieces. For small punctures, we're running our tires with Orange Seal, which should stop most leaks on the fly. For larger punctures where sealant isn't enough, we carry a plug kit. If it's something worse – say a torn sidewall, we carry a tire boot, as well as a needle and dental floss, to sew the tear if necessary. And if all else fails, we have two spare tubes in size 27.5+, for use on either bike, should we run into situations where a tire won't hold air.
Spares
Traveling in Europe, I'm not too concerned about the general availability of spare parts. That said, we're still carrying some basics including a set of replacement brake pads for each bike, chain links, a couple of valve stems, and an assortment of spare screws, washers, etc.
Multitool (Blackburn Wayside; Qty: 1)
Leatherman (Leatherman Wave; Qty: 1)
8mm Wrench (for King Cage Universal Support Bolt, although Leatherman will work)
Pump (Lezyne Micro Drive HV; Qty: 1)
Tire Levers (Pedros Tire Levers; Qty: 2)
Tire Plugs (Genuine Innovations Tire Plug Kit; Qty: 5 Plugs)
Tire Boot (Park Tools TB-2 Tire Boot; Qty: 1)
Patch Kit (Park Tool VP-1 Patch Kit; Qty: 1)
Tubes (Vittoria 27.5 Plus Lite; Qty: 2)
Tire Sealant (Orange Seal Endurance w/ Injector; Size: 4oz; Qty: 3)
Spare Tire Valves (Qty: 2)
Brake Pads (Avid BB7; Qty: 4 Sets)
Chain Links (Sram Powerlinks; Qty: 4)
Chain Lube (Squirt Dry Lube; Size: 120ml; Qty: 1)
Tire Valves (See ‘Tire Repair'; Qty: 2)
Spare Spokes (DT Swiss; Qty: 6)
Nuts & Bolts (Assorted)
Zip Ties
Electrical Tape (Electrical Tape)
Duct Tape (Duck Tape / Gorilla Tape
Ziplock Bags
Water Storage
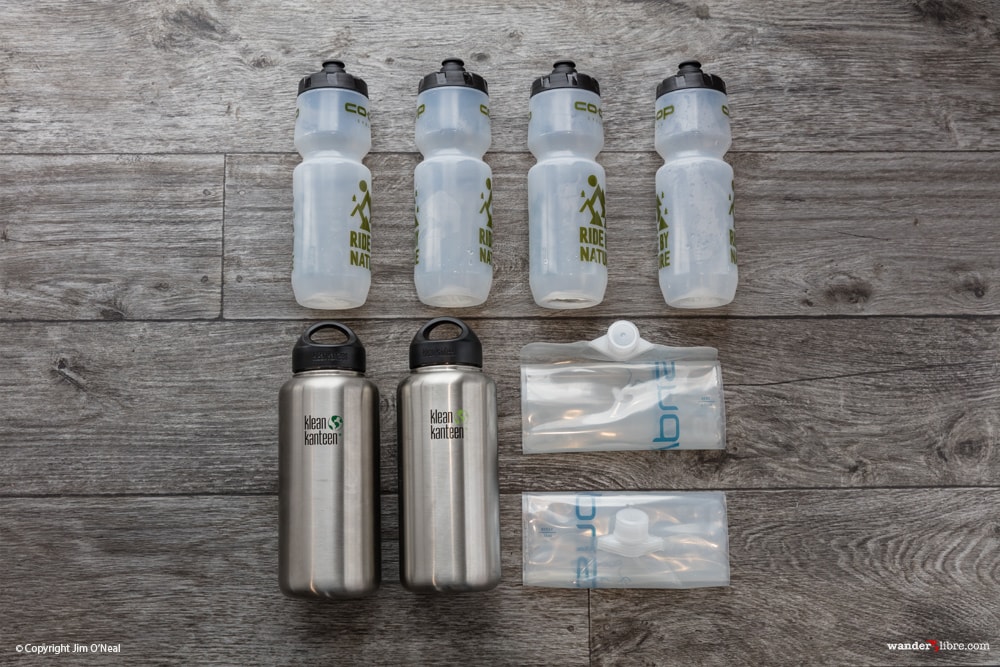
For Europe, we have a total water capacity of a little over nine liters, which is split between two 40oz Klean Kanteens, four 26oz REI Coop water bottles, and two 2L Platypus Bags. To carry it all, we store each Klean Kanteen in a Salsa Anything Cage mounted on the downtube and the REI Coop bottle in a Lezyne Power Cage that's mounted on each front fork. This keeps the weight low and the water accessible. Generally, the Platypus bottles, which stow easily when not being used, offer added capacity for trips further afield. In addition, we have the option of putting an REI Coop bottle in each Revelate Feedbag for quick access while riding.
Stainless Steel Bottles (Klean Kanteen, Vol: 40oz; Each; Qty: 2)
Plastic Bottles (REI Coop Bike Bottles, Vol: 26oz Each; Qty: 4)
Collapsible Water Bags (Platypus Bags,Vol: 2L Each; Qty: 2)
Cook Kit
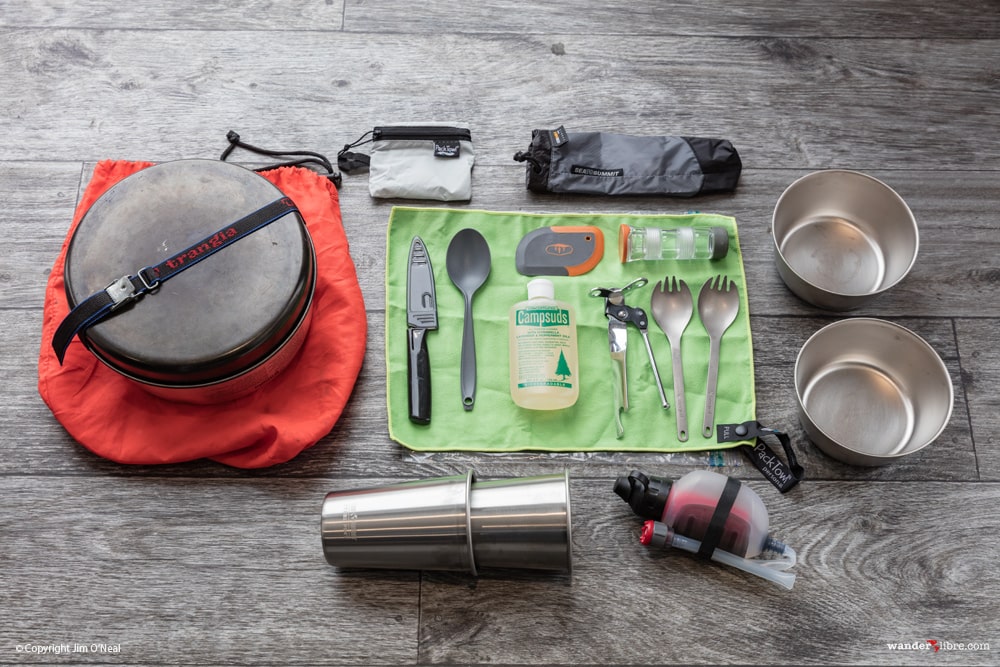
Far from the full kitchen in our Land Cruiser, we're carrying a pretty basic cook set. The cornerstone is our Trangia alcohol stove (included in the cookset link below), which served us well on our motorcycle ride up to Alaska. In the past, we've used pretty much everything from LPG, to multi-fuel, to fuel canisters. All have strengths and weaknesses. Alcohol is our fuel of choice for long-term travel as it's simple, reliable, and basically service free. We're using a Trangia 25 Series UL Cookset, which is sized perfectly for two people. The kit includes a very handy windscreen, 2 non-stick pots, non-stick frypan, a strainer that doubles as a cutting board, carry bag, and removable pot grabber. At 905g, it's not the lightest setup on the market. But for long distance travel, it's a highly livable setup that makes daily food prep less of a chore
Want a more minimalist setup? A good option is to pair Varga's ultra-light titanium Hexagon Wood Stove (116g) with a Trangia alcohol stove (110g) and Varga's 1.3L Titanium Pot (153g). The Hexagon makes a great stand for a Trangia burner and can be fueled by burning wood as well. At a total weight of 379 grams, It's much lighter, although in exchange you lose quite a bit of the Trangia 25's versatility.
Stove / Cookset (Trangia 25 Series UL Cookset; Qty: 1)
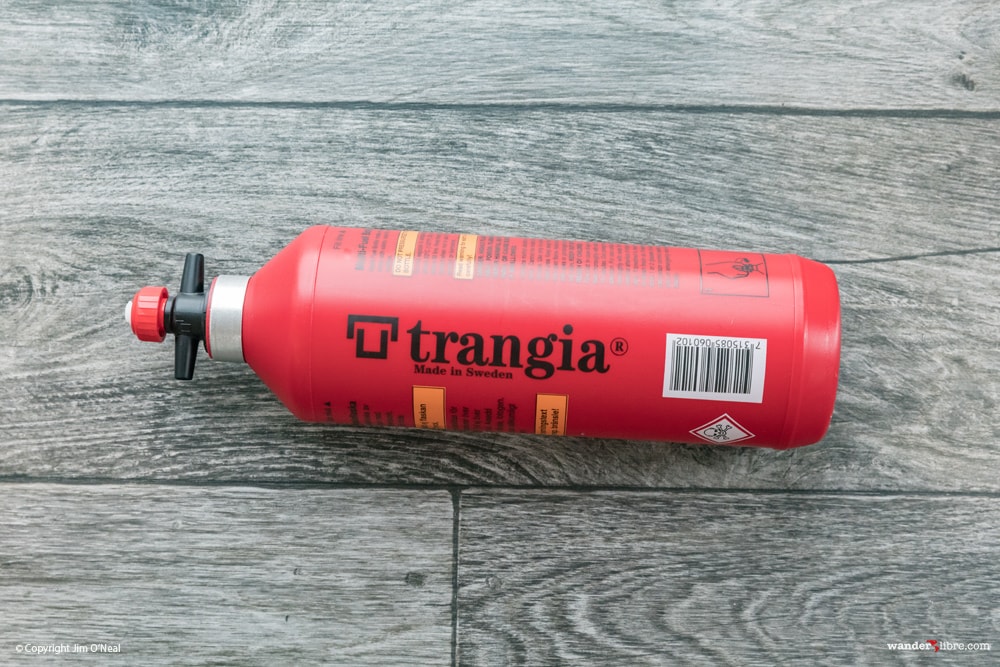
Fuel Bottle (Trangia 1L Fuel Bottle; Qty: 1)
Water Filter (MSR Trailshot; Qty: 1)
Bowls (Titanium; Qty: 2)
Cups (Klean Kanteen Stainless Steel 16oz; Qty: 2)
Serrated Knife w/Sheath (Kuhn Rikon Serrated Knife 4 inch; Qty: 1)
Sporks (Snow Peak Titanium Sporks; Qty: 2)
Can Opener (Basic Generic; Qty: 1)
Pot Scraper (GSI Outdoor Compact Scraper; Qty: 1)
Spoon (REI Plastic Spoon; Qty: 1)
Spice Holder (GSI Outdoor Spice Missile; Qty: 1)
Utensil Bag (SeaToSummit Peg & Utensil Bag; Qty: 1)
Drying Towel (Pack Towel; Qty: 1)
Dishwashing Soap (Campsuds; Qty: 1)
Camping
Tent
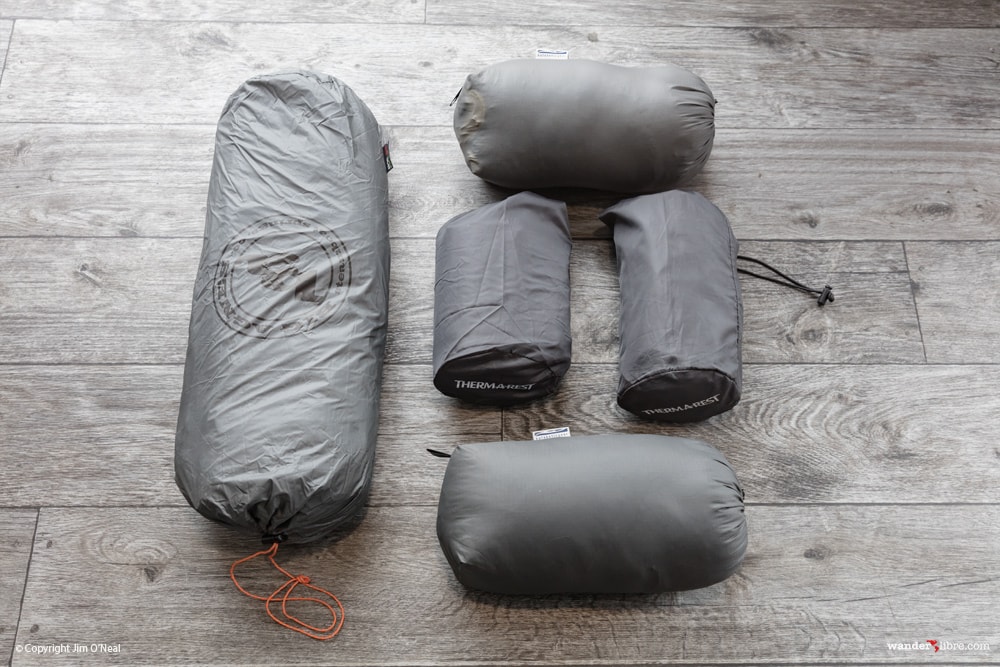
Our current sleeping setup is light, compact, and comfortable. When on the road for long periods, our tent is our home and our sleeping bags and mats our bed. To that end, we try to go as light / packable as possible, but not at the expense of a good night's sleep. Our bikepacking tent, the Big Agnes Copper Spur HV UL3 mtnGLO, ticks all the right boxes. Easy to set up. Lightweight. Packable. Plenty of room for two adults and bike touring gear. While we only purchased the Copper Spur just before starting our trip, it's quickly won us over. When compared to our other tents, it bests our Big Agnes Fly Creek UL3 for comfort/livability (score one for mtnGLO integrated lighting & 2x doors / vestibules) and our Hilleberg Keron 3 GT for size and weight (although the Hilleberg is a different beast entirely).
Sleeping Bags
While we've only just started using the Copper Spur, we've been using our Katabatic Palisade 30 down bags almost daily since 2015. They're extremely light and pack down so small that we can easily fit both bags and our down jackets into Sheri's Ortlieb Handlebar Pack without fuss. Having used mummy bags in the past, we're fans of the quilt design. The Palisade is comfortable and versatile. When cold, use the included straps and/or add a down jacket for greater warmth. When warmer, use the Palisade more as a blanket than a bag.
Sleeping Mats
I have a love/hate (mainly hate) relationship with UL sleeping mats as most of ours have succumbed to heavy use. Perhaps we're just overly hard on gear. I'm not sure. Regardless, the NeoAir XTherm is the latest mat to be put to the test. So far, so good. We've both been sleeping soundly every night and are very pleased as the XTherm is comfortable, light, packable, relatively quiet, and (so far) still holds air.
Tent (Big Agnes; Qty: 1)
Down Sleeping Bags (Katabatic Palisade 30; Qty: 2)
Sleeping Pads (Thermarest NeoAir XTherm; Qty: 2)
Safety & Security
Bike Security
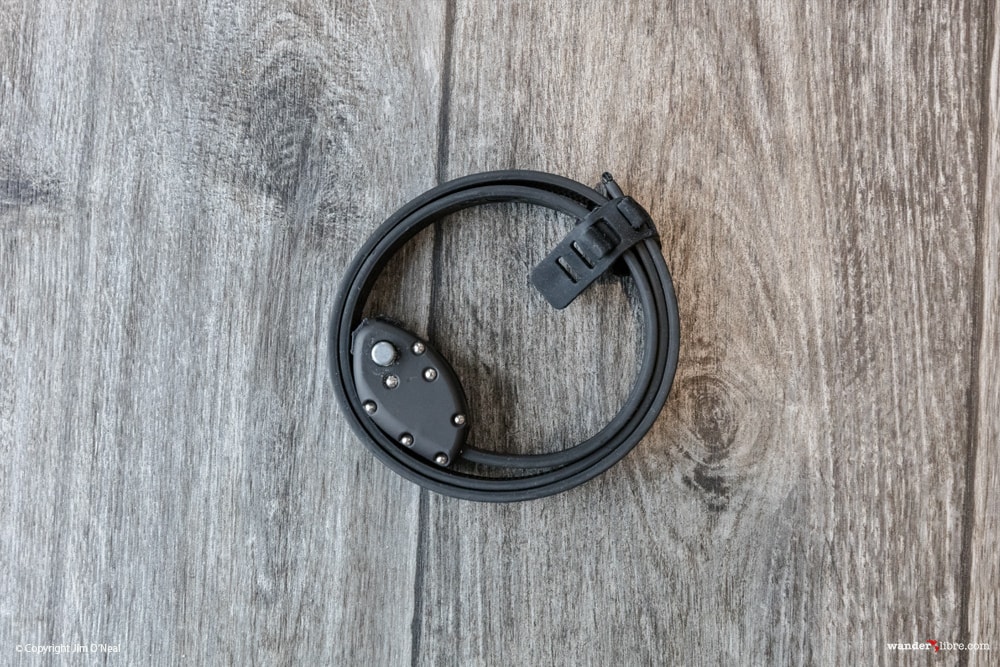
We're not fans of big heavy bike locks or other cumbersome security measures. In our experience, if someone is determined to take it, they're going to get past whatever security you've got. (Remind me sometime and I'll tell you about the time our friends were camped in their rooftop tent on a beach in Mozambique and thieves cut out their Land Cruiser's 12mm security glass to get inside). That said, rather than carrying a heavy lock, we rely more on common sense. And common sense dictates not leaving our bikes unattended in places where there's a risk of theft. For situations we generally consider safe – say a quick stop at a shop in a small village – we grab our bag that includes important items/valuables and lock the bikes with a simple Otto Cinch Lock. The Otto is fantastic for this purpose. It's light, packable, and tamper resistant. Our only regret – I wish we'd gone with the 60", as the 30" is pretty limiting for two bikes.
Rider Safety
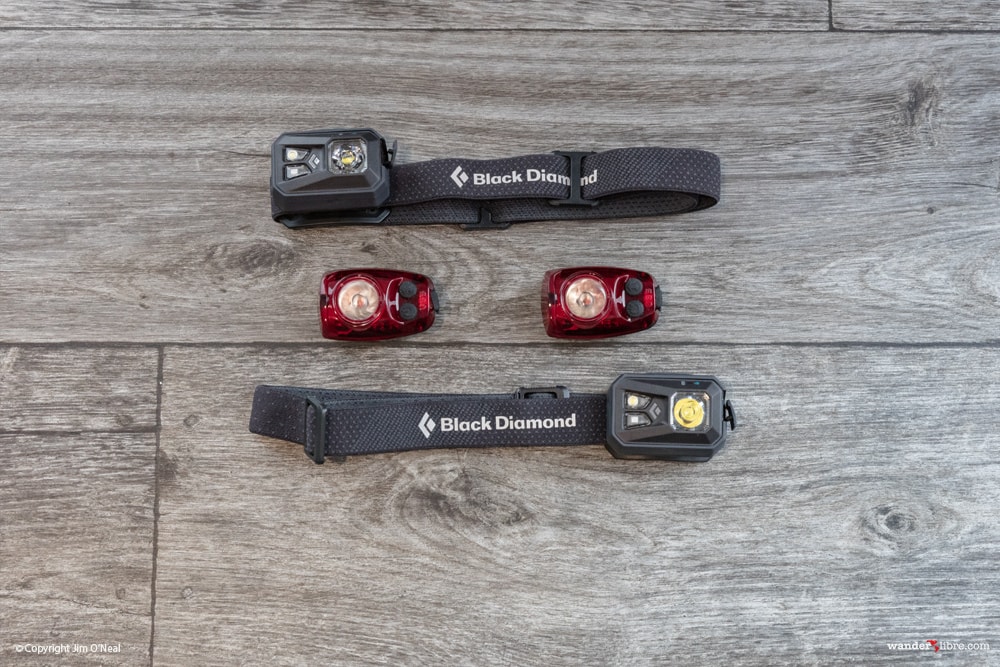
Our goal with bikepacking is to go beyond paved roads – putting in as many miles on gravel, single track, and low traffic secondary roads as possible. But invariably, we'll be doing plenty of miles on paved roads too. For on-road stretches, we've opted for a simple solution to increasing our visibility. We're using Cygolite's super bright 150-lumen HotShot Pro 150 rear lights and Black Diamond's 300-lumen Revolt Headlamps. Both lights are USB rechargeable and offer a less expensive and more versatile alternative to wiring dynamo lights into our Son 28 hub.
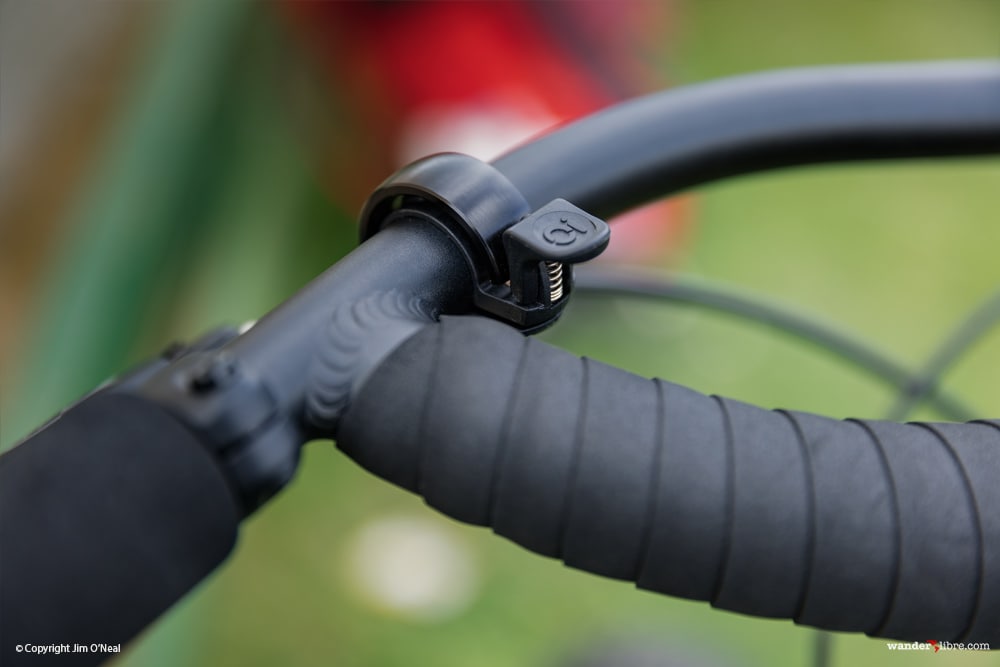
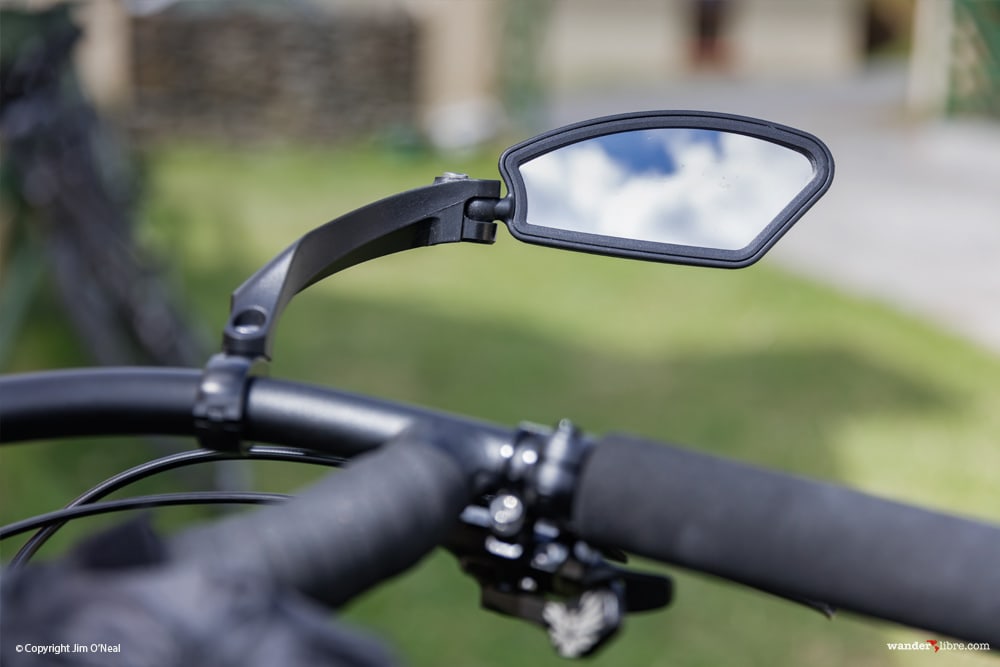
For added safety, we've also added a tiny Knog IO bike bell to each bike as well as Venzo Stainless Steel Handlebar mirrors.
Bike Lock (Otto Lock Cinch 30")
Front Light (Black Diamond Revolt Headlamp; Qty: 2)
Rear Light (Cygolite Hotshot Pro 150; Qty: 2)
Bell (Knog OI Bike Bell; Qty: 2)
Rear View Mirror (Venzo Stainless Steel Handlebar Mirror; Qty: 2)
Bike Helmets (Giro Phase (Sheri), Giro Hex (Jim); Qty: 2)
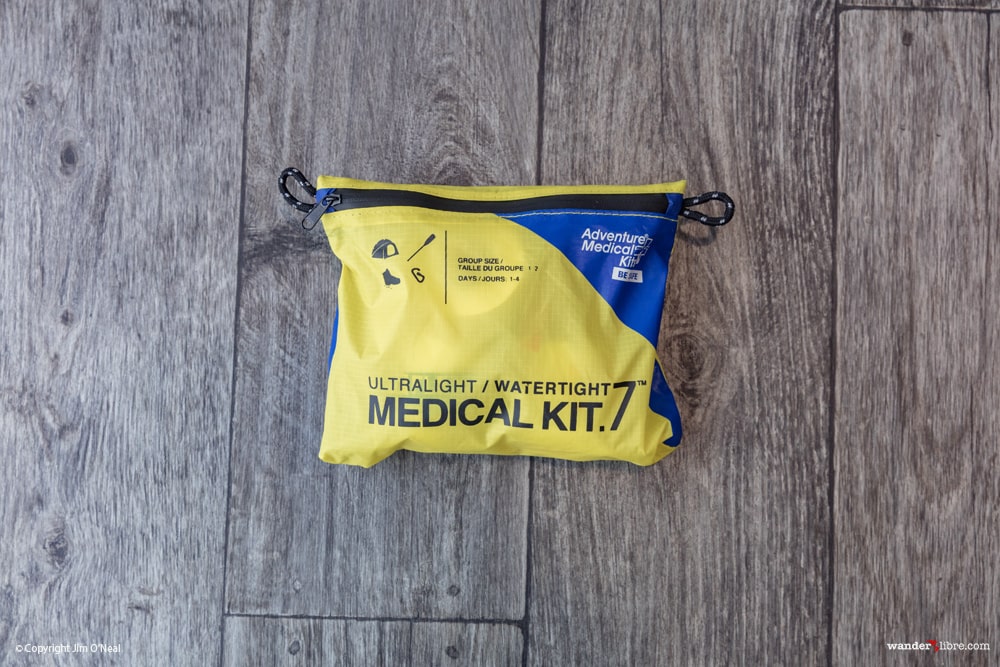
Medical Kit (Adventure Medical UL 7; Qty: 1)
Camp Chairs
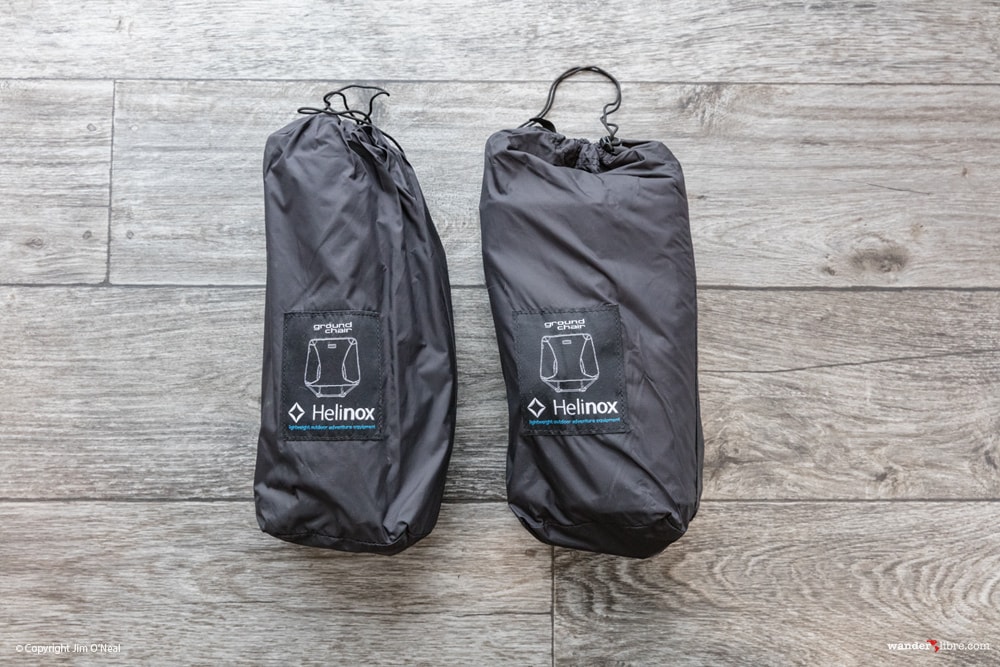
OK, I'll admit, this is a 100% luxury item that breaks from the minimalist mindset, but nonetheless, a nice addition. In my mind, one of the big distinctions between ‘roughing it' and camping comfortably is having a nice place to sit and relax. To that end, we loved our Helinox Camp Chairs for motorcycle travel and decided to give them a go on our Europe bikepacking trip. As camp chairs go, they're light, packable, easy to set up, and comfortable. We're not talking Lazy Boy, but they're a considerable upgrade from sitting in the dirt. Conveniently, our Helinox Chairs stow nicely inside a Salsa Anything bag (1 on each fork).
Camp Chairs (Helinox Camp Chair; Qty: 2)
Bikepacking Clothing
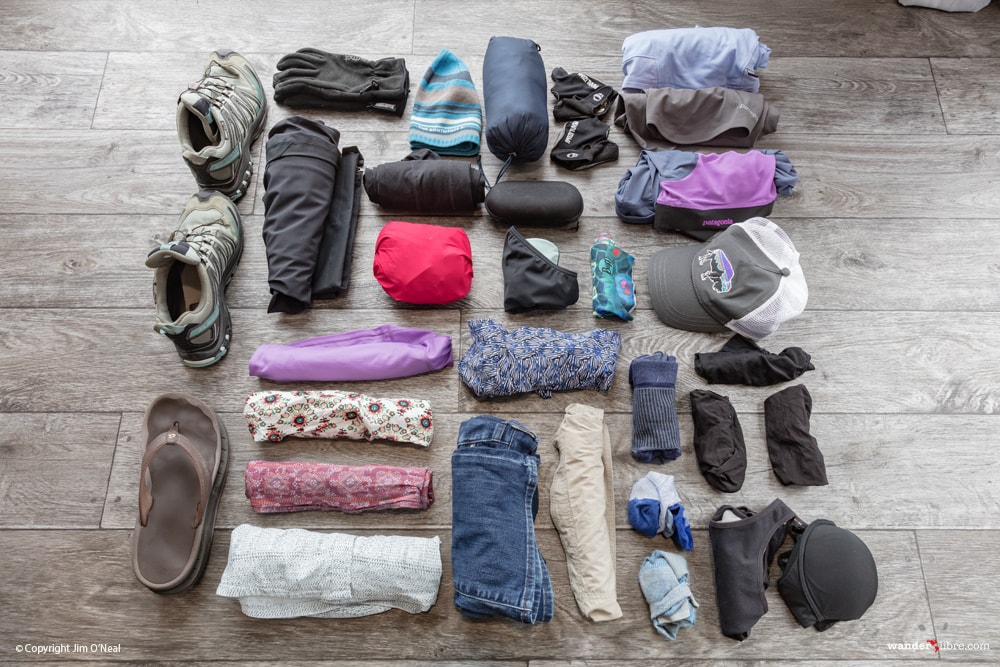
You've probably heard this before, but I remember someone once saying "when packing for a trip lay out all your clothes and all your money, then take half the clothes and twice the money." It's good advice for any trip, although when bikepacking I could argue half the clothes is still about half too much. Deciding what clothes to bring is always a bit of a trick. With little room to spare, it's a question of how to keep weight/bulk to a minimum while solving for a diverse array of situations that range from riding, hiking, and trail running in hot/cold/wet/dry conditions, to swimming, lazing around camp, wine tasting, exploring around town, and all the other situations you encounter on the road.
Striking the right balance is tough. Our approach is to bring items that serve as many functions as possible, while not getting so caught up in utility that we overlook comfort. This translates into carrying clothes that are 9/10's get-the-job-done (lightweight, quick-drying, hardwearing, etc.) and 1/10th want to wear (i.e., more comfort than function, like jeans and cotton t-shirts).
Jim's Clothes
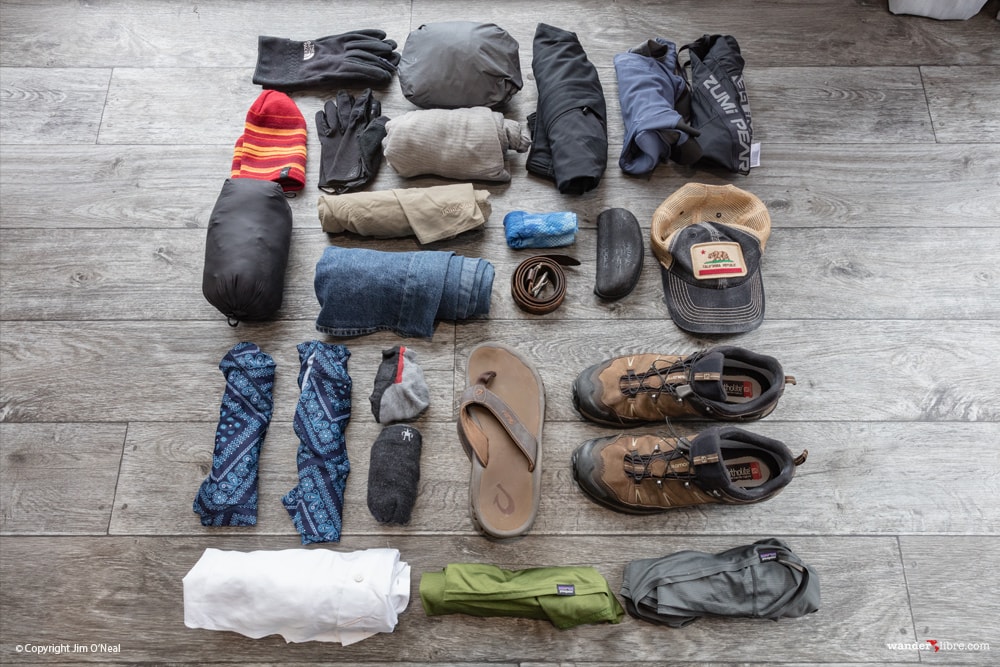
Padded Liner Shorts (Patagonia Endless Ride Liner Shorts; Qty: 1
Shorts (Patagonia Stretch Wavefarer Walk Shorts; Qty: 2)
Cycling Tights (Pearl Izumi Pursuit Attack Tights; Qty: 1)
Rain Pants (REI Rain Pants; Qty: 1)
Jeans (Qty: 1)
T-Shirt (Patagonia Capilene Lightweight T-Shirt (2), Cotton T-Shirt (1); Qty: 3)
LS Button Down (Mountain Hardwear Canyon; Qty: 1)
LS Thermal Shirt (Patagonia Cap 4; Qty: 1)
Socks (Smartwool Light Hiking (2), Smartwool Running (1); Qty: 3)
Boxer Shorts (Patagonia Capilene Daily Boxers; Qty: 2)
Trail Shoes (Salomon X-Ultra LTR GTX; Qty: 1)
Sandals (OluKai Ohana; Qty: 1)
Shell / Rain Jacket (Arcteryx Beta LT; Qty: 1)
Down Jacket (Arcteryx Cerium LT; Qty: 1)
Fleece Gloves (North Face Windstopper; Qty: 1)
Riding Gloves (Giro DND Gloves; Qty: 1)
Beanie (Arcteryx Beanie; Qty: 1)
Trucker Hat (SL Revival hats) (Qty: 1. Note: Really cool hats display state flag for each US state)
Sunglasses w/ case (Suncloud; Qty: 1)
Buff (Qty:1)
Travel Towel (Qty: 1)
Eyeglasses w/ case
Sheri's Clothes
Padded Liner Shorts (Patagonia Endless Ride Liner Shorts; Qty: 1
Riding Shorts (Patagonia Dirt Roamer Cycling Shorts; Qty: 1)
Casual Shorts (Kuhl Shorts; Qty: 1)
Leggings (Marmot; Qty: 1)
Rain Pants (REI Rain Pants; Qty: 1)
Jeans (Qty: 1)
T-Shirts (Patagonia Capilene Lightweight T-Shirt (1), Cotton T-Shirt (1); Qty: 2)
LS Button Down (REI Sahara Pattern LS Shirt; Qty: 1)
LS Windstopper Shirt (Mountain Hardware; Qty: 1)
Casual ¾ Shirt (Kuhl Flora ¾ Shirt; Qty: 1))
Casual Sleeveless Shirt (Boden Printed Swing Top; Qty: 1)
Socks (Patagonia Light Hiking (1), Smartwool Running (2); Qty: 3)
Underwear (Patagonia Active Hipster; Qty: 3)
Trail Shoes (Salomon XA Pro 3D CS WP Trail-Running Shoes; Qty: 1)
Sandals (OluKai Ohana; Qty: 1)
Shell / Rain Jacket (Arc'teryx Beta SL; Qty: 1)
Down Jacket (Arc'teryx Cerium LT; Qty: 1)
Fleece Gloves (Marmot Windstopper; Qty: 1)
Riding Gloves (Qty: 1)
Beanie (Beanie; Qty: 1)
Trucker Hat (Qty: 1)
Sunglasses w/ case (Qty: 1)
Buff (Qty:1)
Travel Towel (Qty: 1)
Eyeglasses w/ Case
Toiletries & Laundry
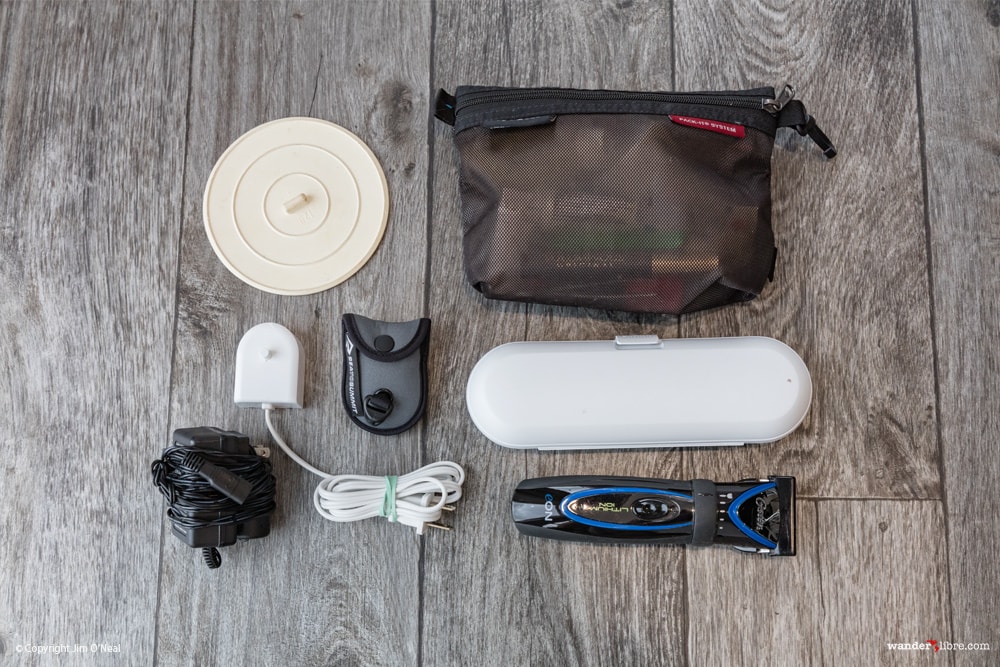
What to say about the glamorous subject of toiletries? Not too much other than toiletries are a bit like clothes. Unless we're careful, a toiletries bag can easily add a lot of weight. To minimize weight we share pretty much everything down to a razor (only using separate blades). One of our favorite items is something we picked up from another traveler years ago. The Lush Shampoo Bar. I think Lush bars are well known as a weight saver among backpackers on extended trips. About the size of a Macaron, one shampoo bar lasts us about three months (sharing).
On the other end of the spectrum, we add some weight back by carrying a Philips Sonicare. The Sonicare is an investment to avoid dental issues. So far, it's paid off. During our most recent leg of travel, we were out of the US for almost two years and missed all the checkups in the process. During our last check-up, the hygienist cleaning our teeth said it didn't look like we'd missed a cleaning. Score one for the Sonicare.
Beyond that, it's pretty much all the usual toiletries stuff.
Bag (Eagle Creek Pack-It Sac; Size: Small; Qty: 1)
Shampoo (Lush Shampoo Bar; Qty: 1)
Toothbrush (Philips Sonicare Flexcare+; Qty: 1)
Toothpaste (Size: small; Qty: 1)
Dental Floss (Qty: 1)
Hair Brush (Spornette Carry On Wooden Handle Mini Hair Travel Brush; Qty: 1)
Deodorant (Size: Small; Qty: 1)
Lip Balm (Qty: 1)
Razor & 2 Blades (Gillette Mach3; Qty: 1)
Shaving Cream (Size: Small; Qty: 1)
Insect Repellent (Size: Small; Qty: 1)
Contacts (6 month supply)
Contact Disinfectant Solution (3 oz. bottle)
Sunscreen (Sun Bum SPF 50; Size: Medium; Qty: 1)
Hair Clippers (Oster Rechargeable; Qty: 1)
Nail Clippers
Dry Bag – for Washing Clothes (SeaToSummit – ‘See below')
Detergent (Campsuds – ‘ See Cook Kit')
Sink Stopper (Qty: 1)
Clothes Line (SeaToSummit Clothes Line; Qty: 1)
Electronics
Staying Connected
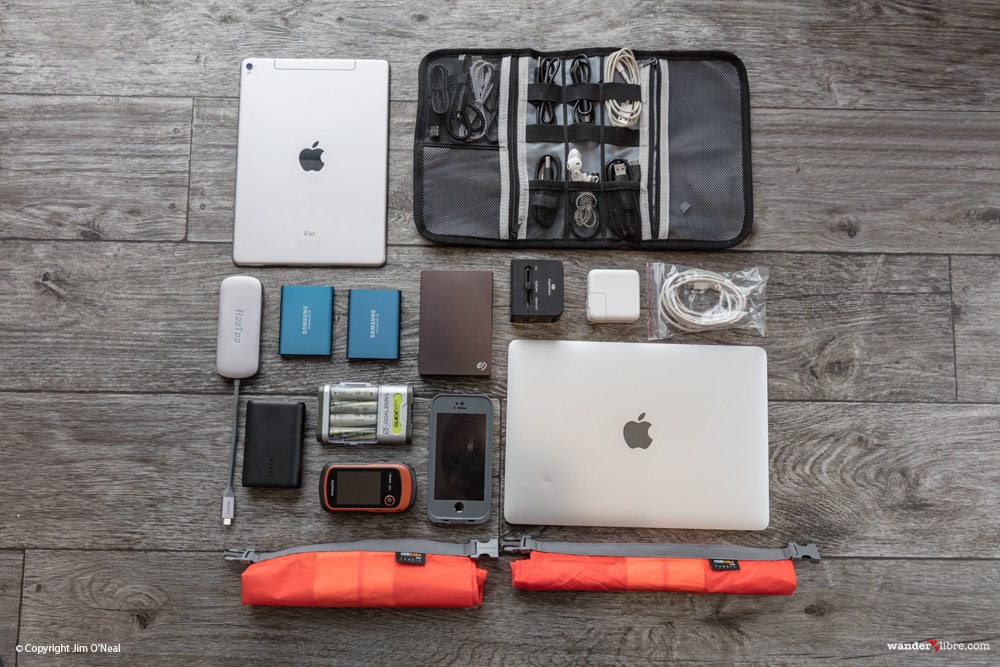
For a short trip, I'd prefer to leave most of our electronics at home. But when traveling for more extended periods, we like to stay connected and on top of photo processing and other tasks. For bikepacking we've chosen to carry our lightweight MacBook 12" and iPad along with some additional external memory. Ideally, we'd bring just 1-2 tiny Samsung T5 2TB SSD's, but opted for 2 Samsung 500GB SSD's and a 4TB Seagate HD to save a bit (read: a lot) of money. To connect everything to our MacBook's USB-C port, we're trying out a new USB-C hub. The HooToo 3.1 Hub has an SD card reader and ports for 3 USB devices (1 powered for charging small devices), plus an additional port for an HDMI device.
Power Hungry
Keeping everything powered up is the challenge on bikes, particularly when wild camping where there's no place to plug-in. Being new to bikepacking, right now we're in a testing phase to figure out what works best. For smaller devices including our Garmin GPS and iPhone, we're using a Son 28 Dynamo hub in concert with an Anker Powercore 10000 and Goalzero Guide 10 Plus. For more details, see 'Powering Our iPhone & Garmin GPS' under 'Navigation' below.
Cables, Cables, Everywhere
The other trick to packing a bunch of electronics is managing all the cables and accessories. For that, we're using a cable organizer. Relatively small and lightweight, a cable organizer has proven a great addition to our packing system, which has kept us from pulling out hair searching that missing USB cable.
Laptop (Apple MacBook 12"; Qty: 1)
Tablet (iPad Pro 9.7"; Qty: 1)
Phone (iPhone SE w/ Lifeproof Fre Case & Handlebar Mount; Qty: 1)
Portable GPS (Garmin eTrex 20x; Qty: 1)
SSD Drives (Samsung T5 Portable SSD 500GB; Qty: 2)
Hard Drive (Seagate Slim Backup Plus 4GB; Qty: 1)
Cache Battery (Portable Anker Powercore 10000; Qty: 1)
Rechargeable AA Batteries (Goalzero Guide 10 Plus; Qty: 1)
USB-C to USB / SD Card Reader (Qty: 1)
Cable Organizer (BUBM Cable Organizer; Qty: 1)
Travel Adapter (Cape Union Mart Int'l Plug Adapter; Qty 2)
Headphones (iPhone Ear Buds; Qty 2)
Assorted Accessories / Cables
Dry Bags (SeaToSummit Ultra-Sil Dry Sacks; Vol: Multiple Sizes; Qty: 6)
Camera & Video Equipment
Camera Gear
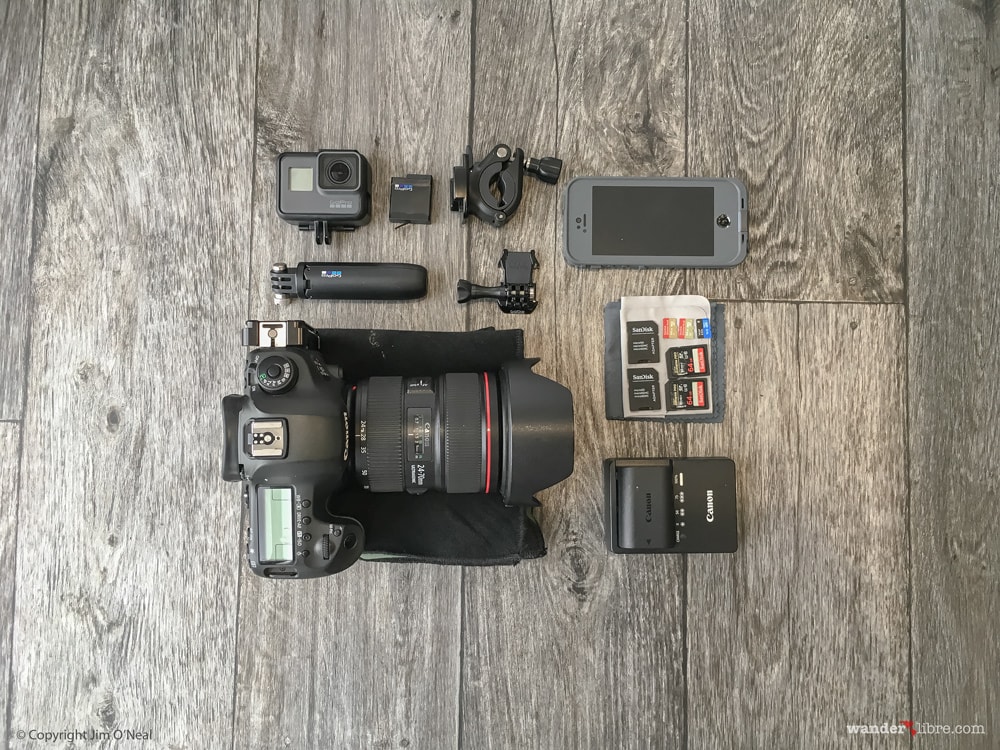
There's no question: if you truly want to go light, skip the camera and associated electronics. It ticks all the wrong packing boxes. Heavy. Bulky. Fragile. Expensive. But, if you love photography, it's exceedingly hard to leave behind. Unfortunately, most of our camera gear is currently being stored with our Land Cruiser, so we had to cobble together a setup from the gear we have with us. And what we have is a Canon 5DSR and Canon 24-70mm f2.8L lens. Together, the 5DSR + 24-70mm f2.8L are capable of producing stunning images. That said, it's not my preferred bikepacking setup as it's heavy, lacks both ultra-wide and long focal lengths, and requires a sturdy tripod to get the most from the 5DSR's 50MP sensor. It is, however, more than enough to take great photos and has seen significant duty thus far.
If I were building a bikepacking setup from scratch, I'd probably go lighter and smaller. A Canon 5D Mk IV with a couple of prime lenses, like Canon's tiny 40mm f2.8 pancake, would shave some weight in a versatile full-frame package. Alternatively, going mirrorless would be a great option. I'd consider the Olympus OMD or Sony A7 with a couple of prime lenses. I've had my eye on both for quite some time and particularly like the OMD's diminutive size and rugged build.
Video Gear
Currently, we have several good options for capturing our trip on video, including the video capability built into the 5DSR and iPhone. Additionally, to capture our rides, we're carrying a GoPro Hero 5 Black with chest harness, handlebar mount, and tripod. Thus far, this combination has been ideal for capturing our rides from a variety of angles.
Camera (Canon 5DSR; Qty: 1)
Lens (Canon 24-70mm f2.8L; Qty: 1)
Video Camera (GoPro Hero 5 Black; Qty: 1)
iPhone SE (See Electronics)
Camera Batteries (Canon LP-E6N Batteries w/ Charger; Qty: 2)
GoPro Batteries (Qty: 2)
Chest Harness for GoPro (GoPro Chesty; Qty:1)
Tripod for GoPro (GoPro Shorty; Qty: 1)
Handlebar Mount for GoPro (GoPro Handlebar / Seatpost / Pole Mount; Qty: 1)
Makeshift Bean Bag for Camera (SeaToSummit Dry Sack; Vol: 8L; Qty: 1)
Dry bags for Camera / Video Gear (SeaToSummit Dry Sacks – See ‘Packing Accessories')
Camera Case (Domke Protective Wrap; Size: 19x19; Qty: 1)
Lens Case (Lowe Pro Lens Case; Qty: 1)
Cleaning Cloths (Qty: 2)
SD Cards (SanDisk Extreme Pro 95 MB/s 64GB; Qty 2)
Micro SD Cards (SanDisk Extreme Plus 64GB (2), Lexar Micro SD 633x 16GB (1); Qty: 3)
Navigation
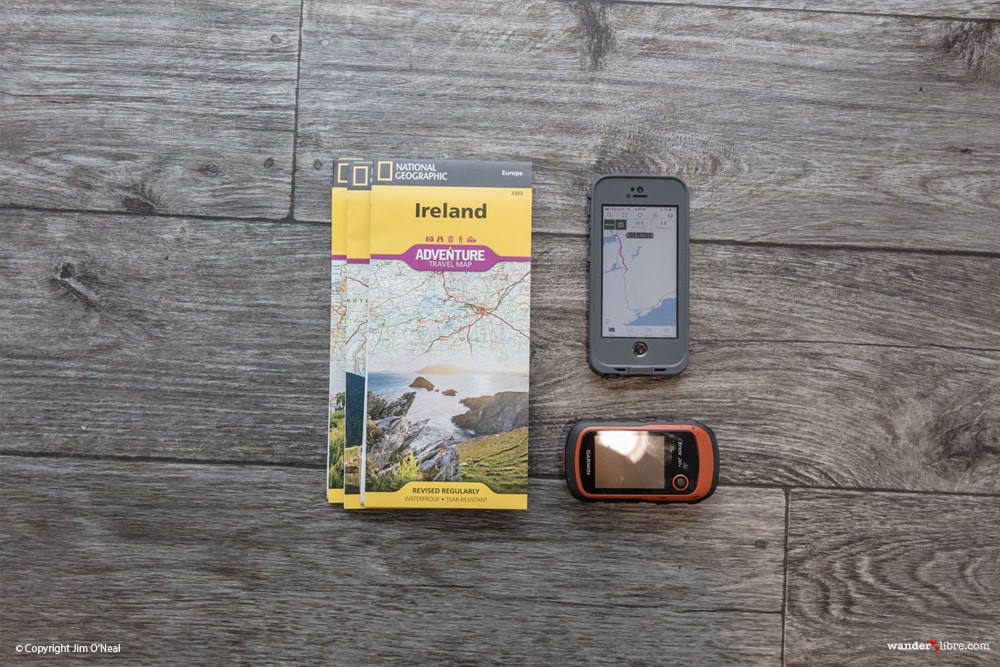
Paper Maps and GPS Based Navigation
Over the past few years, we've made good use of paper maps as well as both smartphone and dedicated GPS devices to guide our overland travel. For many years, we've relied on Michelin's paper maps to show us the way. For GPS, our preferred navigation apps seem to be ever-evolving with Maps.Me, Tracks4Africa, Google Maps, and Garmin Maps all seeing considerable service during the past few years. Generally speaking, our preference these days is smartphone based nav apps like Maps.Me.
For bikepacking, our requirements include all the usual functionality like recording tracks and waypoints, and navigating both on-road and off. Additionally, we've found bike specific route planning tools like topo information particularly useful. Right now, we're in a bit of a testing phase, so I'm hesitant to offer advice on what works best.
What I can share is that we're navigating with an iPhone (preferred) and a Garmin eTrex 22x (backup). For the iPhone, our go-to navigation app is Gaia as it's easy to use and offers the main navigation and recording functions we require. We've also just started testing Komoot, and our early impressions are positive.
Mounting GPS Devices to the Bike
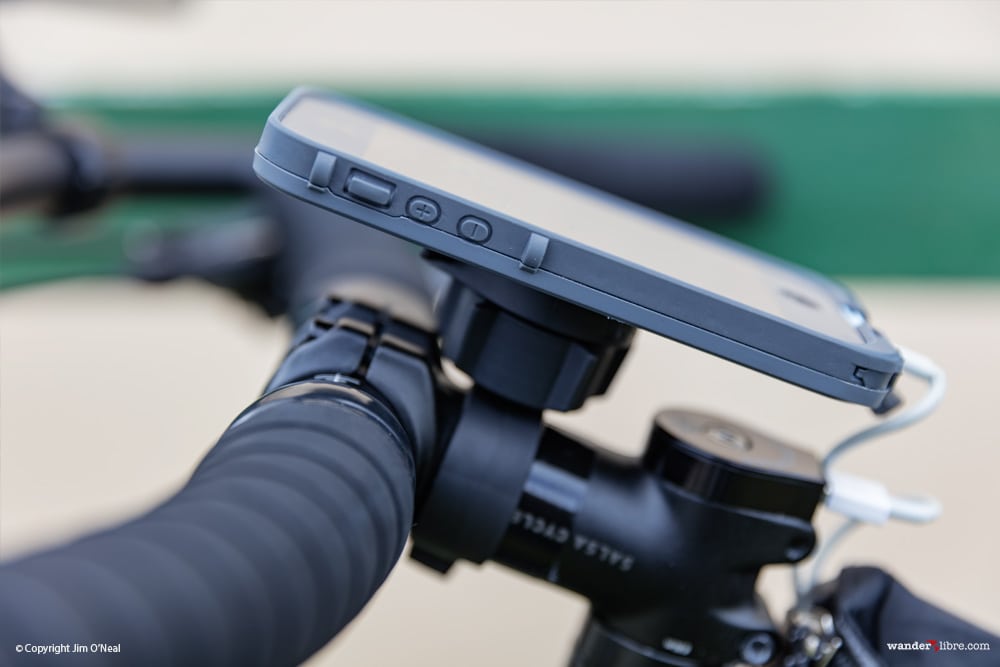
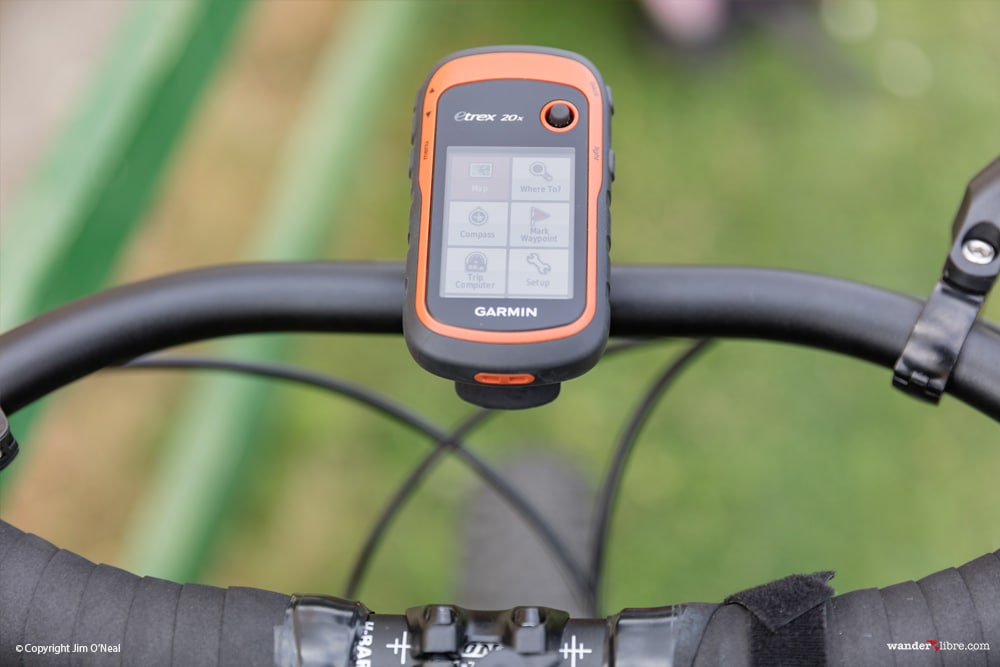
To mount our iPhone and protect it from the elements, we use a Lifeproof waterproof iPhone case, which is mounted via a quick release Lifeproof mount on the stem. This seems the perfect location as it's easy to read without distraction from riding. Similarly, we have a handlebar mount for the Garmin eTrex 20x, which can easily be moved between bikes as needed.
Powering Our iPhone & Garmin GPS
The trick to navigating with a smartphone is keeping the phone charged while on a bike. This can be challenging, particularly when away from plug-in power for days at a time, as navigating and recording tracks can run through a fully charged battery at an alarming rate. Closing apps, reducing display brightness, using airplane mod, and only using navigation periodically to check directions / confirm location reduce power consumption. The eTrex is better in this regard, which makes it a good alternative if you're recording tracks or want navigation on at all times.
To power our navigation devices, we use a Son 28 dynamo hub with a Sinewave Reactor USB Charger. Currently, we plug our iPhone directly into the Sinewave's USB outlet, which keeps our phone charged during long rides. For the Garmin eTrex 20x, we charge four AA batteries via a Goalzero Guide 10 Plus USB charger. That's enough to keep the eTrex going for about four days.
As a backup, and for other USB devices, we carry an Anker Powercore 10000 cache battery. With a capacity of 10,000 mAh, the Anker is a great supplement to our Son 28 for keeping all our headlamps, blinkie lights, GoPro, and other USB powered devices juiced up.
While we haven't had a need to try it yet, we've read reports from others that both the Goalzero and Anker Powercore can be charged via the Son 28 / Sinewave Reactor, which adds some additional flexibility for charging while on the road. As soon as we've tested ourselves, I'll update to share our experience.
Smartphone (iPhone SE; Qty: 1)
Smartphone Case/Mount (Lifeproof iPhone Case w/ Handlebar Mount; Qty: 1)
Dedicated GPS (Garmin eTrex 22x; Qty: 1)
Gaia
Maps.Me
Komoot
Google Maps
Michelin & National Geographic Adventure Maps
Packing Accessories
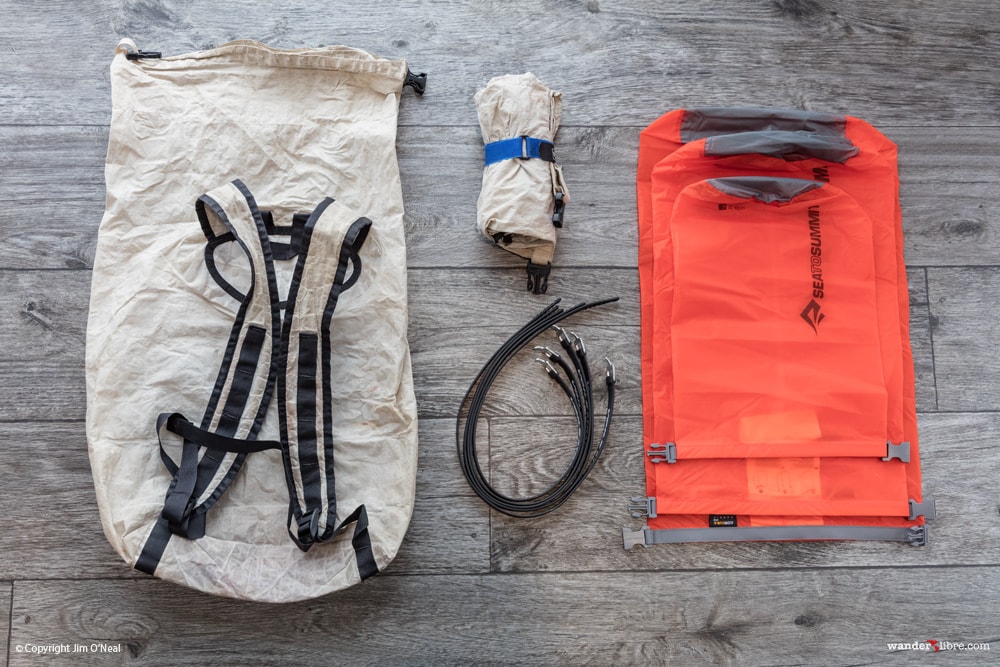
While our bikepacking luggage setup is generally waterproof, we added some SeaToSummit Ultra-Sil Dry Sacks to sort gear and add an additional measure of water protection for sensitive electronics and camera gear. We're also carrying Voile Straps for additional flexibility in lashing things like jackets and extra food to the outside of bags, securing our bike onboard trains, etc. I've been using Voile style straps to hold skis together since I was a kid and prefer their ease of use to buckle straps.
Additionally, we've grown to love Rok-Straps for securing gear to our motorcycles and decided to each carry a pair in case the Ortlieb Gravel Packs rattle a bit on rough off-road sections. It's something we've heard can happen, although during our recent rides on Inishbofin's rocky bog roads, the Gravel Packs did well.
We're also carrying our Hyperlite Metro Packs. Less accessory and more essential kit, our Hyperlite Metro Packs are one of our favorite pieces of travel gear. We've been using our Metro Packs daily since setting off on motorcycles back in 2015 and can't say enough about them. Durable, highly water-resistant, lightweight, and packable, they're the perfect daypack for hikes, runs to the market, exploring around town, etc.
Not interested in the Metro Pack? Click here to read our Buying Guide for the best ultralight and lightweight highly packable backpacks - great options that take little of the precious space on your bike.
Voile Straps (Size: 20"; Qty: 6)
SeaToSummit Ultra-Sil Dry Sack (Size: Misc.; Qty: 6)
Hyperlite Metro Pack (Qty: 2; Vol: 30L each)
Rok Straps (Qty: 4 Staps)
Money & Paperwork
Not a lot to add here. Just our standard paperwork etc. like passports and vaccination certificates.
Passports
Passport Photos
Drivers Licenses (No IDP's on this trip)
Photocopies of Docs
PADI Log Books
Vaccination Cards
Pen
Cash
Credit & Debit / ATM Cards
Amex Travelers Checks (just kidding, wanted to see if you're still awake)
So that covers it. We've been on the road about a month and so far our packing system is working out well. As we gain additional experiences, we'll provide updates on our preferred setup for bikepacking navigation, etc. Also, if you're interested in detailed photos and specs on our bikepacking bikes and bags/luggage setup click here for our post with comprehensive specs and photos.
Have questions or want to share some ideas on what's working best for you? Feel free to add a comment below or drop us an email. We'd love to hear from you.
Here are some other posts you might want to read:
Like This Article? Pin It!
We are a participant in the Amazon Services LLC Associates Program, an affiliate advertising program designed to provide a means for us to earn fees by linking to Amazon.com and affiliated sites.

What about food and storage of food? Keeping food from going off, liquids etc, keeping food cool? You never mentioned that. What foods do you bring with you?
We carry a small amount of “staple” food and our pots in one pannier (so basically it’s our “kitchen” pannier”). We typically carry a few dried spices, pasta, a few sauce packets, oatmeal, raisins, nuts, oil and vinegar (in 16 oz platypus collapsible bottles – the only liquids we carry), a couple of camp meals for emergency situations. We stop at a grocery store almost every day to get our food for the day – fresh vegetables, canned food. If we know we won’t be around a grocery store for a period of time, we carry food supplies in a small dry bag that we strap to the luggage rack. That works out pretty well. We don’t have to worry about food going off or keeping food cool because we don’t/can’t carry food that requires refrigeration. We kept our bags small and carry very little to stay as light as we could. If you choose to carry larger bags, you’ll have more storage space to carry food supplies, and in turn, won’t have to make as many stops to buy food. You’ll quickly develop a routine that works for you.